IX25 quick start guide
Introduction
Welcome to the IX25 quick start guide, which walks you through the essential steps to deploy your device efficiently, ensuring you are up and running in no time.
You're here because you scanned the QR code on the Welcome card that came inside the device's box.

Before you begin
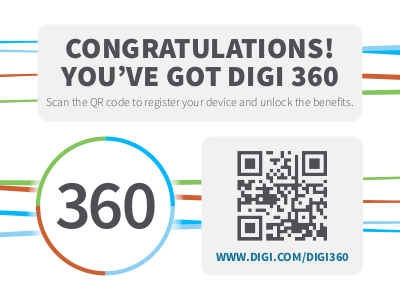
Review your Digi 360 subscription information.
A CONGRATULATIONS! sticker is now included on the outside of the device's box. This sticker means you have the Digi 360 subscription and your device has a Digi 360 license. Scan the QR code or go to the ![]() Digi 360 page on digi.com for information about this subscription, including benefits and warranty.
Digi 360 page on digi.com for information about this subscription, including benefits and warranty.
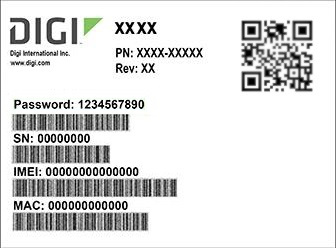
Keep the extra product label sticker in a safe place.
Every device has a product label on the bottom, which has information unique to that device, including product model, part number, QR code, password, MAC address and serial number. There is an identical sticker included in the device's box. You can refer to the information on this extra sticker if you do not have access to the hardware. Using the extra product label sticker is the most efficient way to register devices in Digi Remote Manager.
Click a link to open the DAL-OS product-specific user guide for specifications and additional details about each component or accessory.
|
Your laptop, tablet, or smart phone |
Note Inserting a physical SIM card is optional. Your device supports eSIM, which allows you to add cellular profile(s) onto the built-in eSIM and use it for connectivity without installing a physical carrier-specific SIM card.
-
Locate the SIM Cover on the right side of your device.
-
Use a #0 or #1 Philips screwdriver to loosen the captive screws and remove the SIM Cover to expose the two SIM Card Slots and Trays.
-
To remove SIM Card Tray 1 (top), lightly push the tray until you hear it click.
-
Pull the SIM Card Tray out of the SIM Card Slot.
-
Turn the SIM Card Tray over.
-
With the metal contacts on the 4FF SIM Card facing up, push the SIM Card into the Tray.
-
Grease the metal contacts on the SIM card, if needed.
Refer to the DAL-OS product-specific user guide for instructions about greasing the metal contacts on the SIM card.
-
Turn the SIM Card Tray over again.
The metal contacts now face down.
-
To re-insert the SIM Card Tray, push it back into the SIM Card Slot (top).
-
Note Make sure to line up the SIM Card Tray with the top SIM Card Slot. There is a space at the top. If you do not align the SIM Card Tray with the Sim Card Slot, the SIM Card Tray could fall into your device.
-
Push lightly on the SIM Card Tray until it clicks.
-
If you have another SIM Card, repeat this procedure to insert it into SIM Card Tray 2 (bottom).
-
Re-attach the SIM Cover and hand-tighten the screws.
When tightening the screws, do not exceed 4 lb-in. (452 nM-m) of torque. You could damage the SIM Cover or the SIM Slots inside your device.
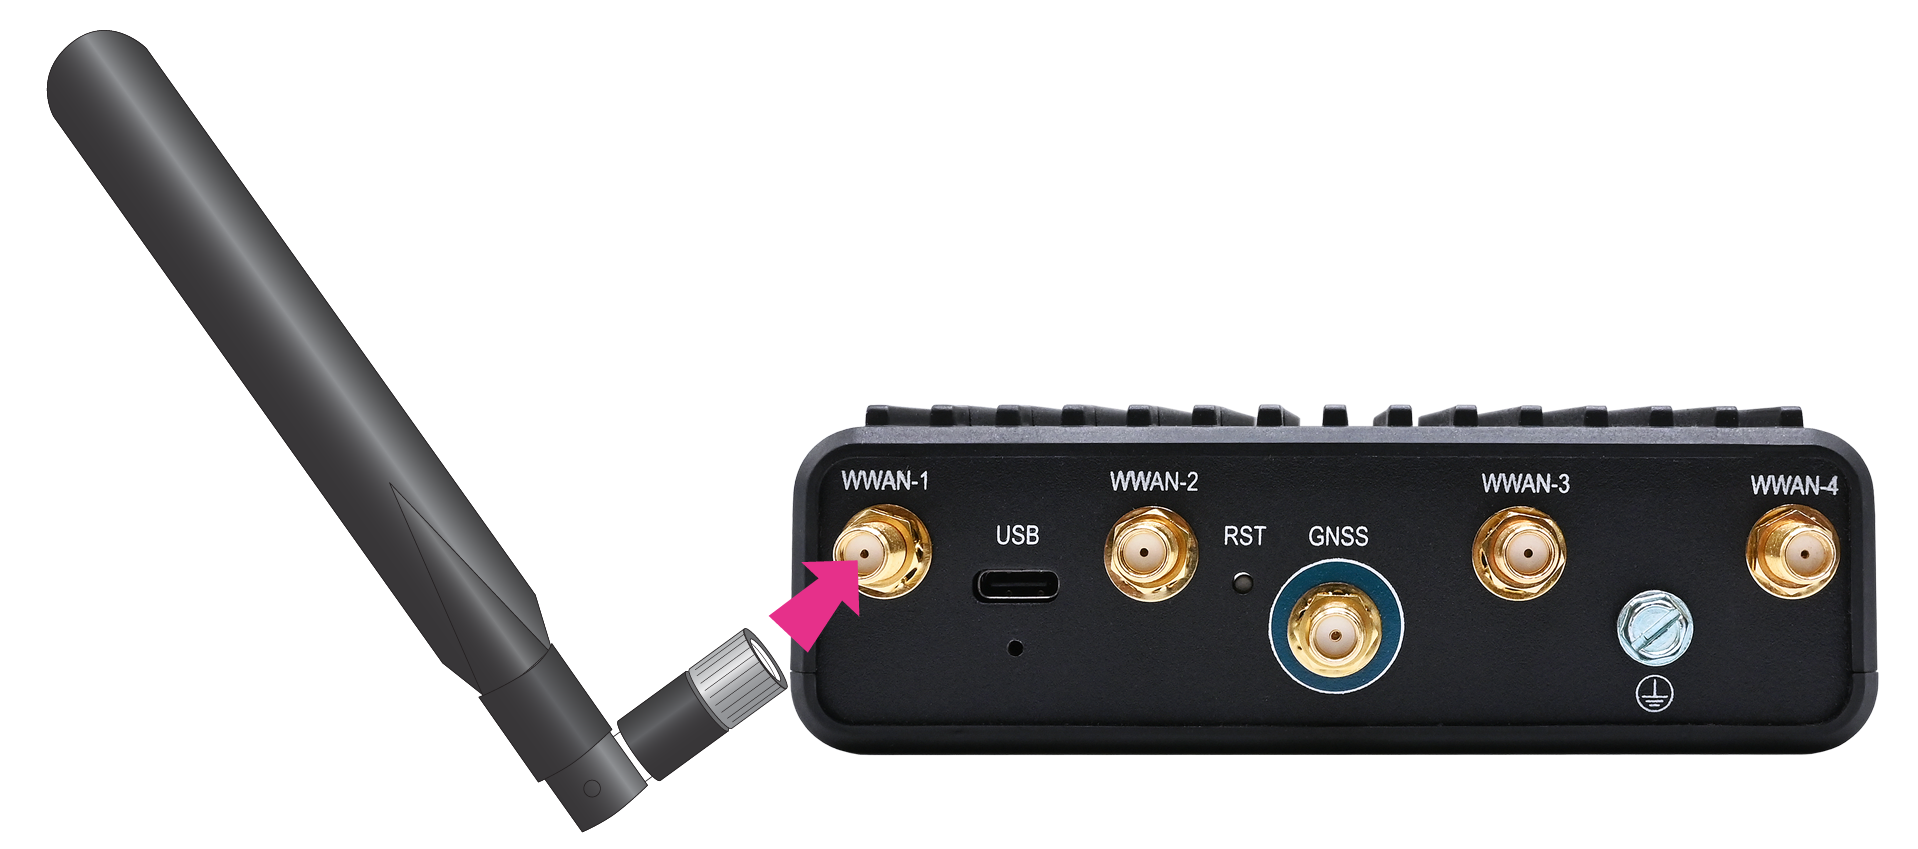
Tip Digi recommends using a high-quality coaxial cable, such as the Pasternack PE3CA1035-12 or equivalent, to connect your IX25 WWAN ports to external SMA antenna mounts.
-
Check the antenna specifications of your specific product model for the types and quantities needed.
Refer to the DAL OS product-specific user guide for the antenna specifications.
-
Align the antenna with the connector on your device.
-
Carefully turn the threaded plastic ring onto the antenna connector.
-
Tighten until finger tight. Do not overtighten and do not cross thread.
Connect the Ethernet and serial cables to the device.
Refer to the DAL OS product-specific user guide for information about the cables and cable connection.
-
Refer to the Device power specifications in the DAL OS product-specific user guide to verify the hardware components required for the power method you plan to use. This section also identifies any additional accessories, DAL firmware, or configuration that may be needed.
Note After the hardware is installed, the device is powered on, and completes the initial boot-up sequence, it enters an activation mode state. In this state, the device is running but has not yet been registered in Digi Remote Manager. Outbound WAN Internet access remains restricted until the device is added to a Digi Remote Manager customer account and receives an activation key. At this point, you can still access the device locally through the CLI or Web UI consoles and prepare it for registration.
-
Register for a Digi Remote Manager account.
Register your device to enable remote monitoring, management, and configuration. You can register a single device or add multiple devices at once by uploading a CSV file. When using a CSV, carefully review the file format and device information before uploading to ensure all fields are completed correctly and match your device details. To simplify the process, download the example CSV and use it as a template when preparing your device list for bulk upload.
If you inserted a physical SIM card, once your device is powered on, it will attempt to set up the APN automatically. However, if your SIM was set up with a custom APN, you will need to configure it manually:
-
Navigate to the Settings tab in the Digi Remote Manager Device Details view.
-
Expand the Config menu item and click the Network settings menu.
-
Expand Interfaces > Modem > modem > APN list > APN list 1.
-
For APN, enter the custom APN provided by your cellular provider.
-
Click Apply.
-
Navigate to the Details tab and watch for confirmation of cellular connectivity.
The device should connect to Digi Remote Manager within a couple of minutes.

If newer firmware is available, Digi Remote Manager will prompt you to update the device. In the dialog box, click Update to update the firmware. Digi Remote Manager will perform the update in the background and let you know when it is completed.
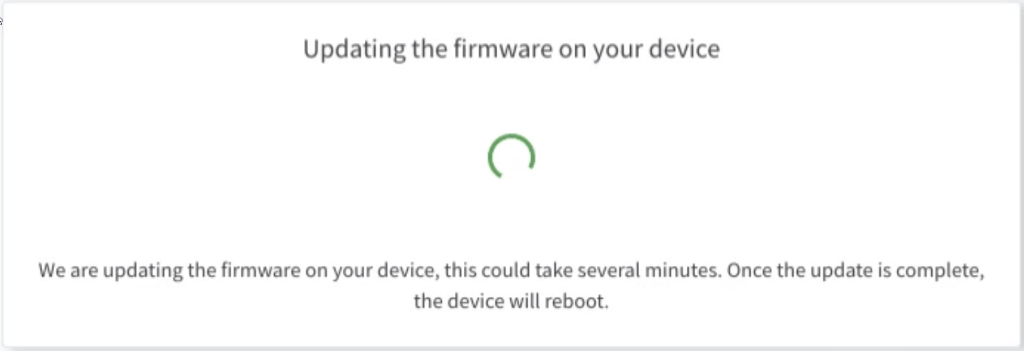
Click Done when the firmware update is complete.
Your device hardware is set up, powered on and connected to the cellular network, and registered in Digi Remote Manager.
You can now proceed to configuring the DAL OS firmware on your device through Digi Remote Manager, or locally via its Web UI or CLI consoles. For configuration procedures, see your DAL OS product-specific user guide.